You love fitness and working out and you probably love reading about fitness, health, and proper eating. Does this sound like you?
You probably have adapted your lifestyle to revolve around fitness so much that some people may have told you that you should start a blog and you have come to the realization that you love fitness and love consuming information, so your best bet would be to combine these things to share your love of fitness!
You can begin today and start a fitness blog in the next 15 minutes!
In the next few minutes, keep all distractions away and follow step by step what I will be outlining below and before you know it, you will be running your very own fitness blog to share any information you want with the rest of the world.
Lets get into it!
How To Start A Fitness Blog
There are 4 main steps to getting started with fitness blogging:
- Getting a domain name
- Setting up hosting
- Installing WordPress
- Making your site look great
Getting A Domain Name
This is my favorite part! A domain name is what people will type into their web browsers to access your site and what it will be called from here on out.
So what should yours be? Anything you want! It could be your name, it could relate to fitness in some way. I decided to go with fitclarity.com because fitness gives me clarity in my every day life. Take a few minutes to come up with some ideas of what you would like yours to be called.
After you have a list of possible names, head on over to NameCheap and see if your domain name is available. Simply type in your name and see the options that have not been registered yet.

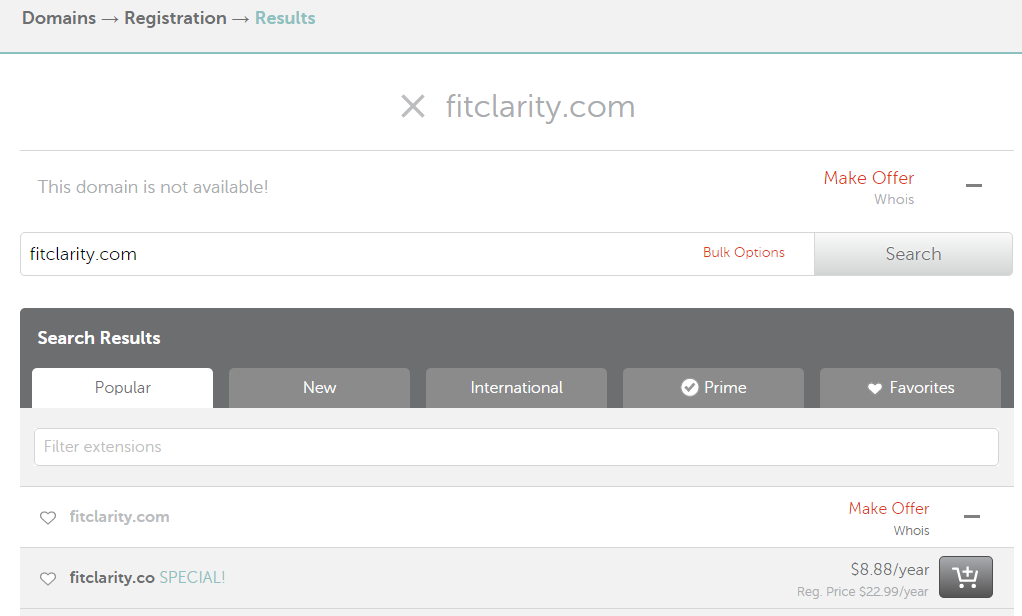
Once you have a domain name picked out that is available. Add it to your cart and go ahead and purchase it with free whois privacy protection. This will keep your real name secret so people from the internet cannot look up who owns that name.
Once you have purchased your domain, select that domain in the NameCheap panel. On the left side, you should see “Transfer DNS to webhost”. Click on this, and keep this window open then move to the next step.
Setting Up Hosting
Now we need somewhere to put all the files for your new fitness blog so you can show them to the world. I recommend you go with Hostgator. I still have many of my websites hosted with them (including fitclarity.com) and their customer support has always been great!
Go with the starter package as it will be the cheapest and everything you need to get started. You can always upgrade later when your site receives lots of visitors each day.
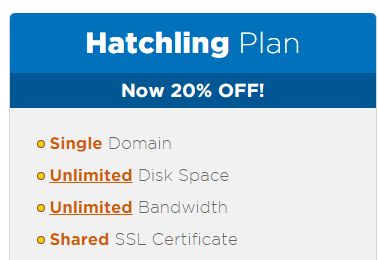
Go through the form and fill it out. Make sure to uncheck all the additional services as I do not think they are needed and I myself do not use them.
When you come to the coupon box, enter FITCLARIY to receive a 25% discount!

Now you should have a hosting account and a namecheap account with your domain name. Now we need to hook them up together!
In your Hostgator account, scroll to the bottom to where it says addon domains. Click this.

Fill in the information. Remember to remove everything from the Document root except for the domain name! This is very important or it will not work. It should look like this:
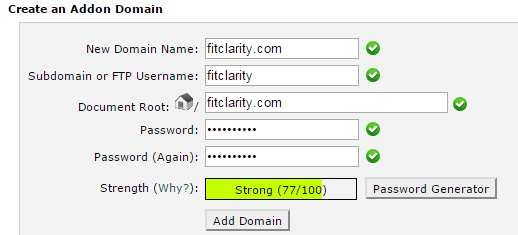
Now that your domain has been added, we simply need to attach our domain name to our account. Remember how we kept the namecheap panel open to the page where we want to transfer the DNS to a webhost?
Scroll to the bottom of your hostgator panel and grab the name servers from the bottom left hand corner.

Take these two lines and paste them into Namecheap! Then hit update DNS servers. That is it, they are all hooked up. Now comes the fun part!
Installing WordPress
Once you have everything else set up, it is time to go to HostGator and install WordPress.
WordPress is the software used by the majority of internet bloggers and what I use for Fitclarity.com. It is incredibly easy to use and even easier to install on your site!
Here is exactly how to do it:
Log in to your HostGator account. Scroll down to the Software and Services box and click on QuickInstall
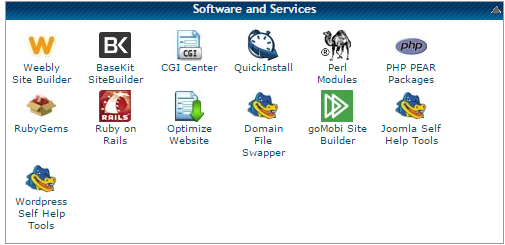
Then click on Install WordPress.
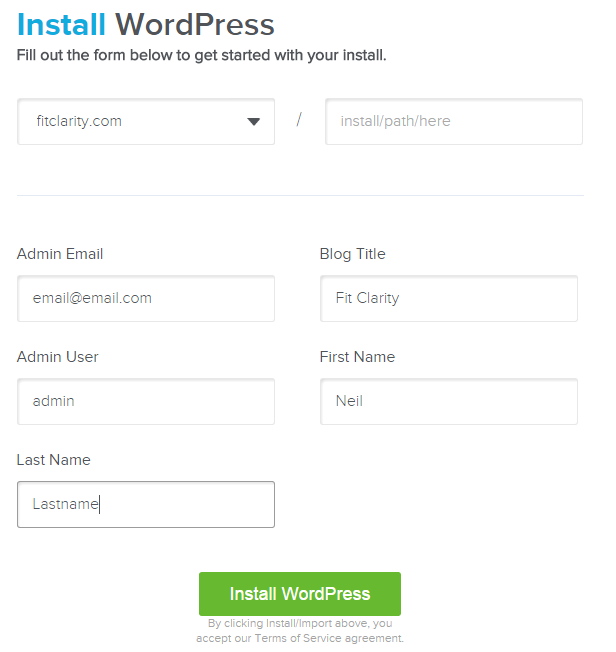
On the next page, simply pick your site from the list (it should be the only one there), fill out the admin email, blog title, user, and your name. Then with one click, your WordPress will be installed!
WordPress has been installed! This should only take a couple of seconds. When it is done, it will give you a link like this:
http://mydomainname.com/wp-admin
Here is where you enter in your admin user, and your password. Enter these in, and click log in and you have just logged into WordPress and are ready to begin fitness blogging!
Making Your Site Look Great
You are at the point where you have your own fitness blog! Congratulations, you have just joined thousands of other people who can share anything they would like at the click of a button.
You could share your best fitness tip in the next couple of minutes by typing up a post and hitting publish!
However, before you start posting all those pictures and fitness advice, you may want your blog to look a little better than what it looks like currently. You need to pick out a theme for your site.
WordPress has thousands of free themes and you can look through them here. However, if you want something a little nicer and more customization, here are my favorite options.
- Genesis Framework – This is what the Fitclarity.com site runs on now. It is simple, easy to use, looks nice, and relatively inexpensive. There are child themes you can use from StudioPress Themes which work great with the Genesis Framework.
- ThemeForest – Themeforest has hundreds of premium themes that look great, are easy to use and are easy on the wallet. I have used a lot of these with other websites I have built. Take look at some of them and see if you like them.
Best of luck with starting your fitness blog. It has been one of my most rewarding experiences and I would not trade it for the world! If you have any questions or concerns, just leave a comment or get in touch on the contact page. Thanks.
Leave a Reply